
")
Installing Your PHONE PLUS System
Option B: Deskphones + Cordless Handsets
Your PHONE PLUS system can be easily installed in four simple steps:


Connecting Your PHONE PLUS Cordless Handsets to Internet
To begin, unbox your Yealink W56H wireless handsets, connect the charging bases to power, and set the handsets in their charging bases.
Next, identify your W70B phone interface unit and connect it to power.
Then follow the steps to connect your W70B to the internet.
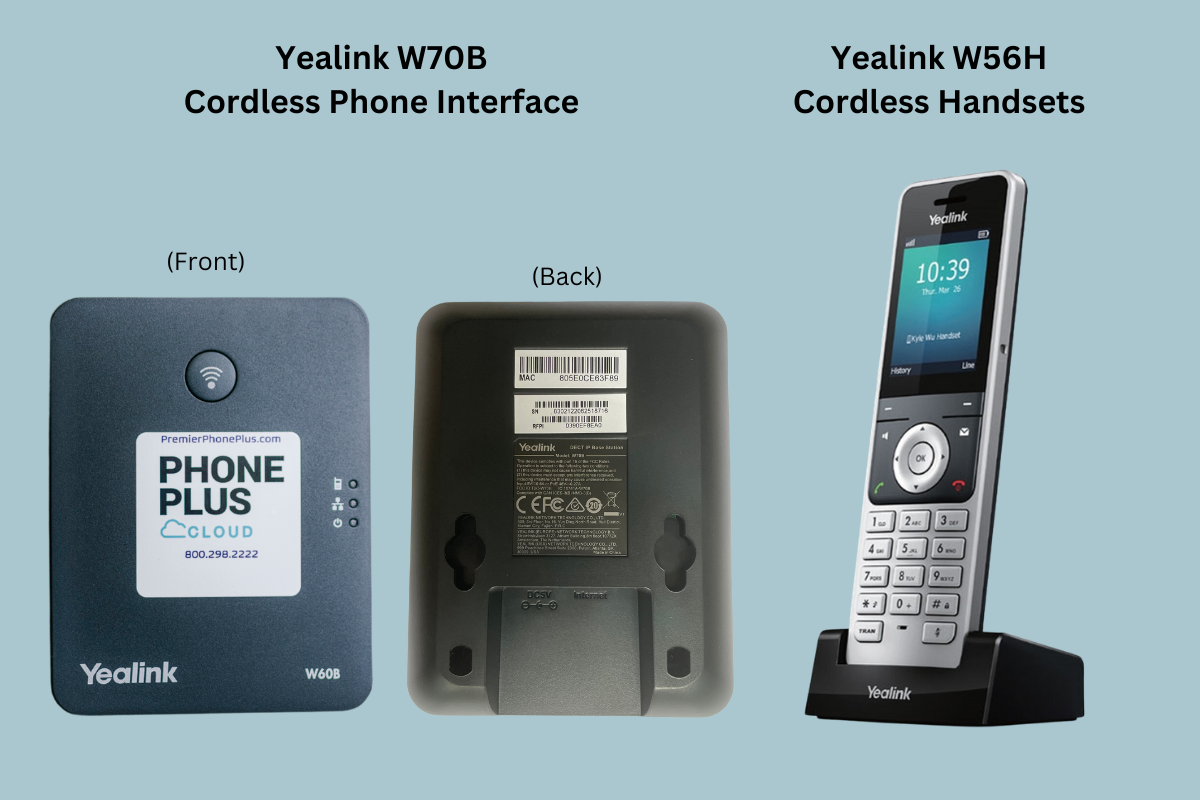
Interface & Handset
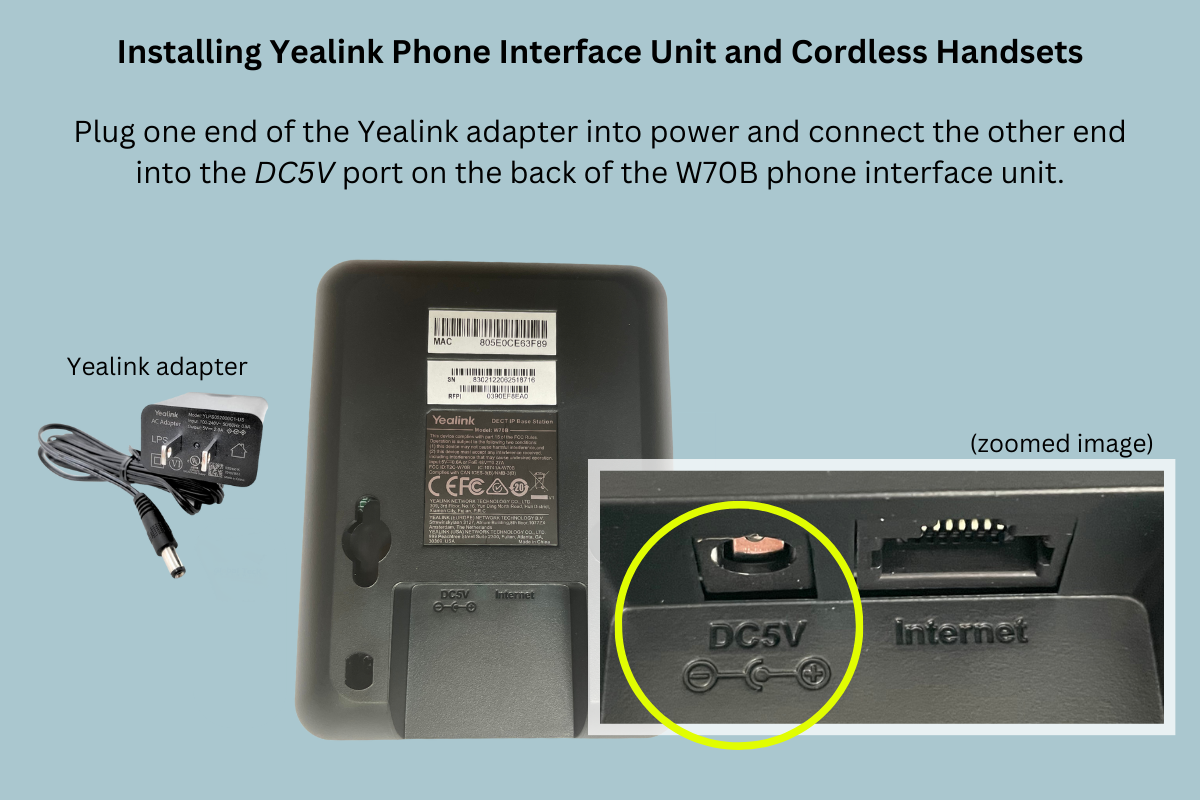
Power Up
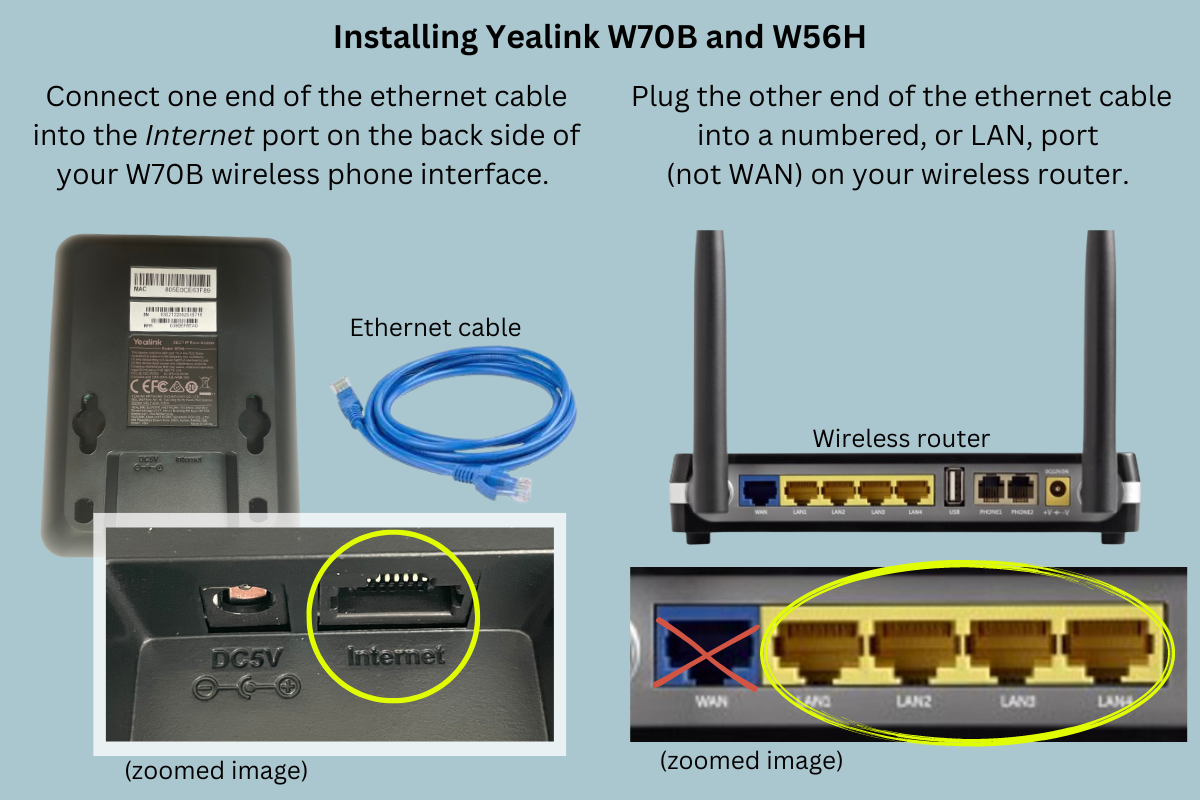
Connect to Internet
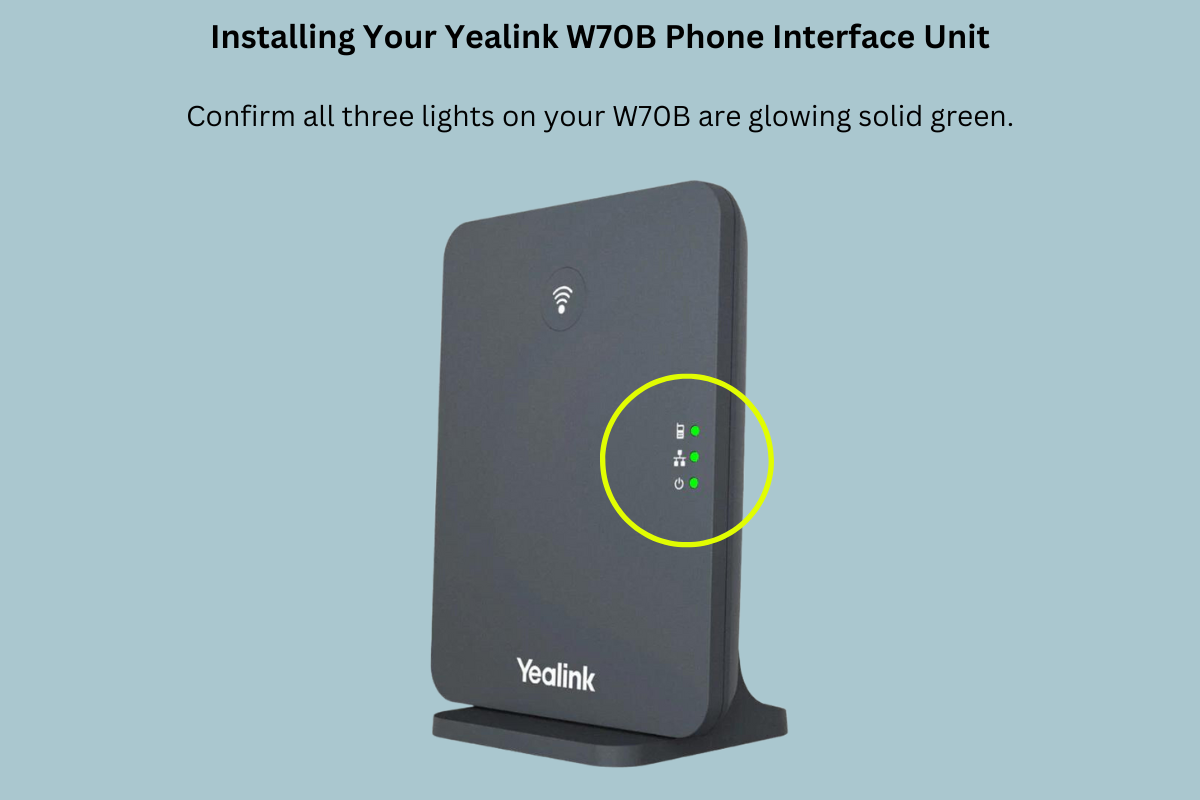
Confirm Connection
Confirm your PHONE PLUS system is connected to the internet. Are all three lights on your Yealink W70B glowing solid green? If so, your system is now connected to the internet.
Once your W70B phone interface unit is connected to the internet, you can now connect your deskphones.
Connecting Your PHONE PLUS Deskphones to Internet
Option 1: Connect directly to wireless router
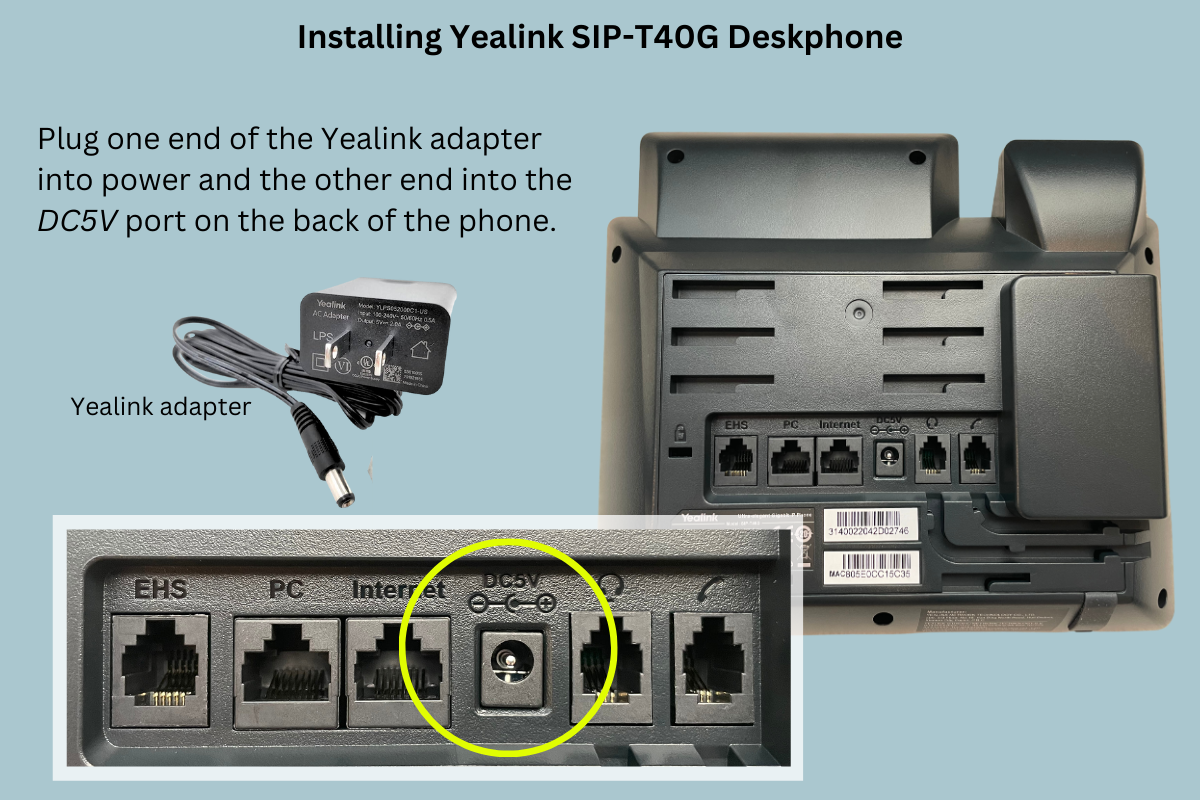
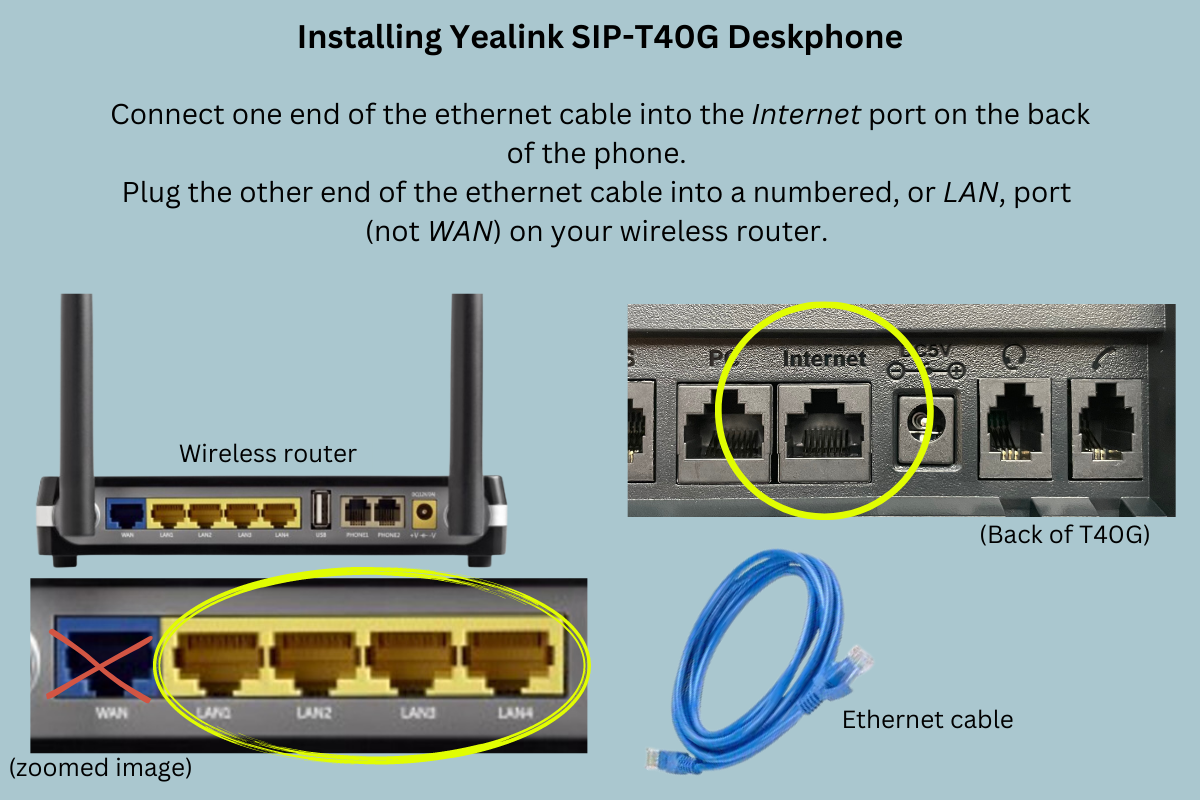
Plug one end of an ethernet cable into the INTERNET port on the back of the Yealink T40G deskphone and plug the other end into an open port on your internet router.
Your deskphone will self provision and identify the connection to your PHONE PLUS system.
Your Title Goes Here
Your content goes here. Edit or remove this text inline or in the module Content settings. You can also style every aspect of this content in the module Design settings and even apply custom CSS to this text in the module Advanced settings.
Option 2: Connect via PC
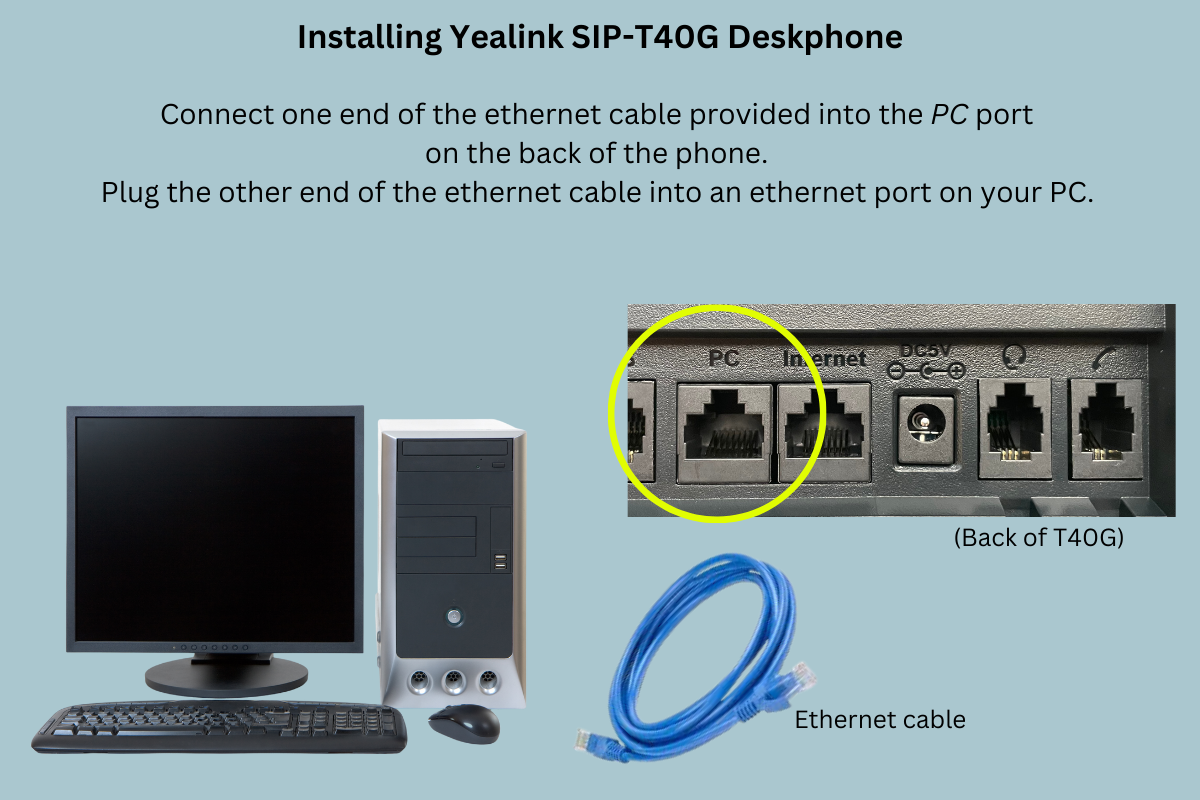
Plug one end of an ethernet cable into the PC port on the back of the T40G deskphone and plug the other end into an ethernet port on your PC.
Your deskphone will self provision and identify the connection to your PHONE PLUS system.
Option 1 Images
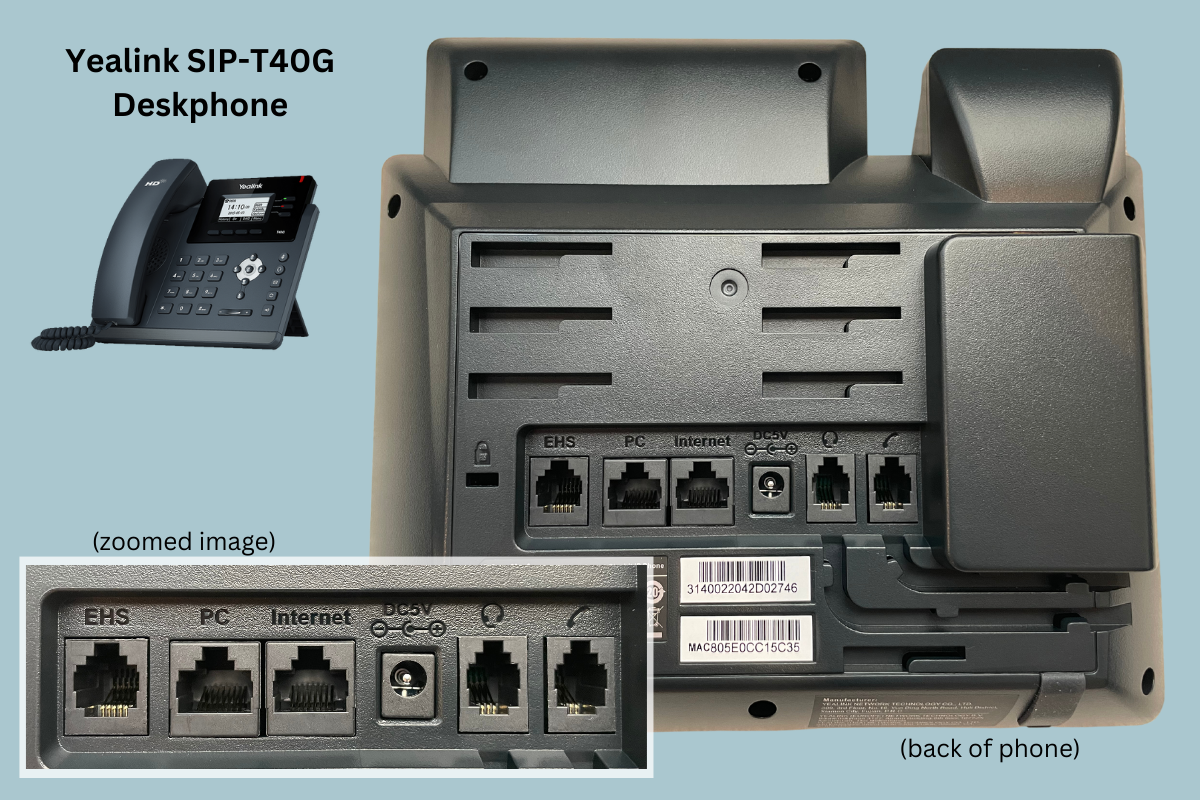
Your deskphone
Power up
Connect to internet
Option 2 Images
Your deskphone
Connect to PC
Testing Your PHONE PLUS System
Let’s test your phones to see that they are working properly.
On the paper install guide we provided, you’ll find a telephone number labeled “Temporary phone number”.
Let’s place a test call by dialing that phone number.
Once your call is connected, press “9” to confirm that all of your new handsets and deskphones ring.
Call Forwarding Your Published Business Telephone Number
*Please note: a very small percentage of businesses will not be able to call forward their number using option A.
If Option A is unsuccessful, Option B or Option C can be used.
Option A: Use one of your old telephones and confirm you are calling out on line 1.
Enter ‘*72’ and wait three seconds, or listen for a short recorded message, then dial the temporary phone number from the install sheet included in your package.
Be sure to include a ‘1’, then the area code, then the seven digit temporary number.
You will hear a confirmation tone or a short message confirming your published number is now forwarded (this verification varies by provider).
From a mobile phone, call your published number to assure you are now hearing the PHONE PLUS greeting message, and once again press ‘9’ to assure all three phones are ringing.
*Please note: If Option A was unsuccessful, please move on to either Option B or Option C.
Option B: Call your current dial tone provider directly and ask to manually call-forward your published number to the temporary number.
Do not hang up the call until you have tested the number by calling your published number from a mobile phone and you are hearing the PHONE PLUS greeting message.
Option C: Log in through your online account that you have with your current dial tone provider and call forward your main line to the temporary number we provided.
Please make sure to test that call forwarding is complete by calling your main phone number, and making sure you hear the PHONE PLUS main greeting.
Fill Out Port Form, Activate Your System
Your PHONE PLUS service is now set up and ready to use!
To fully activate your system, please fill out the Phone Line Port Request form.
Please note: It is imperative that you fill this form out immediately. Your phone system will not be fully operational until the form has been completed and submitted.
If you do not complete the Phone Line Port Request Form you could be paying two phone bills every month.